Storyboarding for Filmmakers: Practical Techniques for Visual Storytelling

Varun Katyal | Founder, Clapboard
Varun Katyal is the Founder & CEO of Clapboard and a former Creative Director at Ogilvy, with 15+ years of experience across advertising, branded content, and film production. He built Clapboard after seeing firsthand that the industry’s traditional ways of sourcing talent, structuring teams, and delivering creative work were no longer built for the volume, velocity, and complexity of modern content. Clapboard is his answer — a video-first creative operating system that brings together a curated talent marketplace, managed production services, and an AI- and automation-powered layer into a single ecosystem for advertising, branded content, and film. It is designed for a market where brands need content at a scale, speed, and level of specialization that legacy agencies and generic freelance platforms were never built to deliver. The thinking, frameworks, and editorial perspective behind this blog are shaped by Varun’s experience across both the agency world and the emerging platform-led future of creative production. LinkedIn: https://www.linkedin.com/in/varun-katyal-clapboard/
Translating Scripts to Visuals: The Storyboarding Process Steps to convert a script into storyboards...
Why Storyboarding for Filmmakers is Essential What is storyboarding for filmmakers? Storyboarding fo...
Choosing the Right Aspect Ratio in Storyboarding for Filmmakers How aspect ratio shapes your storybo...
Depicting Movement: Characters and Camera in Storyboards How to show movement in storyboards Depicti...
The Art of Continuity: Ensuring Seamless Storytelling Continuity in storyboarding is not just a tech...
Breaking Down the 180-Degree Rule in Storyboarding What is the 180-degree rule in storyboarding? The...
Digital Tools and Templates: Modern Storyboarding for Filmmakers Storyboarding has always been the h...
Industry Insights: Storyboarding Best Practices and Pitfalls Top storyboarding mistakes filmmakers m...
Real-World Examples: Storyboarding for Filmmakers in Action Storyboarding for filmmakers: real film ...
Conclusion Storyboarding is not a technical chore—it's the backbone of filmmaking pre-production. Ac...
FAQs What is the importance of storyboarding in filmmaking? Storyboarding is the visual architecture...

Translating Scripts to Visuals: The Storyboarding Process
Steps to convert a script into storyboards
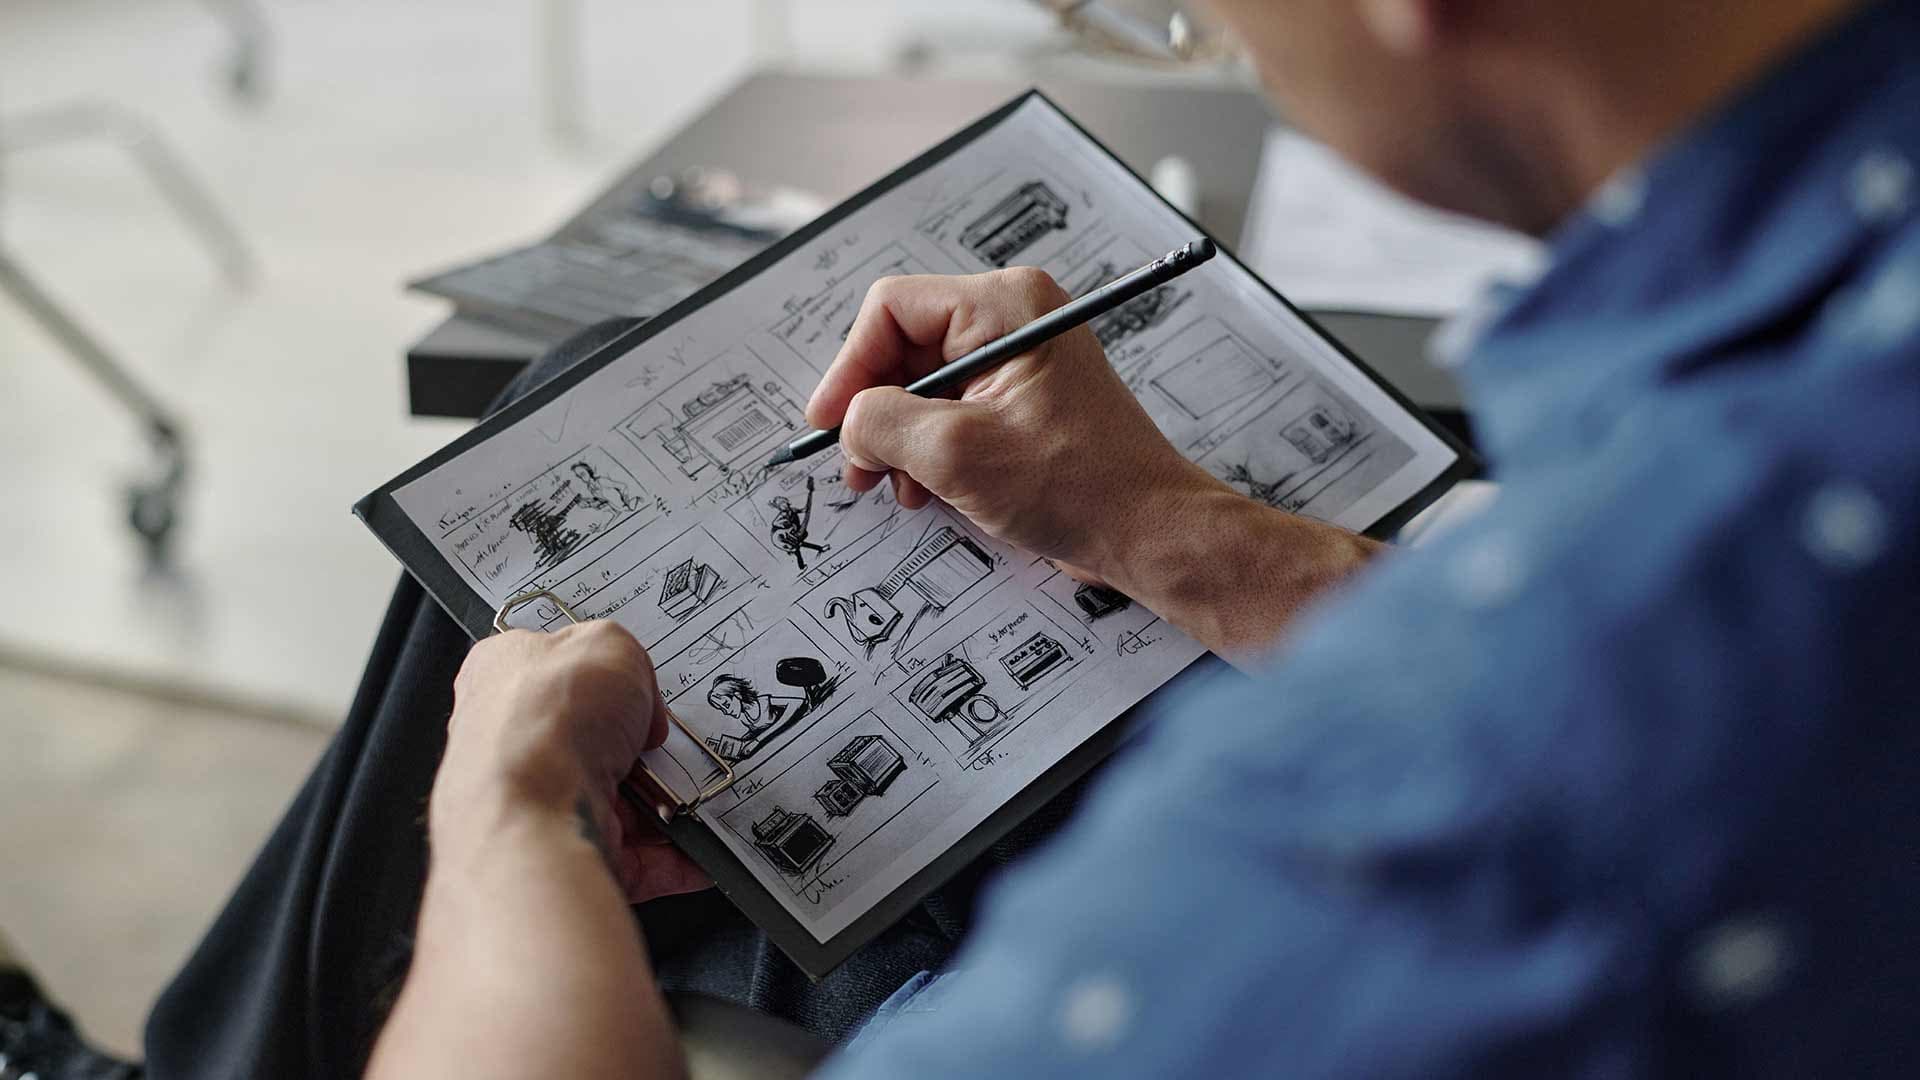
The storyboarding process is where written intent becomes visual architecture. It starts with a disciplined script breakdown. This isn’t just a technical pass—it’s a search for the visual DNA of the project. Each scene is dissected for its narrative function, emotional temperature, and logistical demands. The script is mapped into sequences, each one earmarked for its visual potential and storytelling weight. This is not about illustrating every line, but about identifying which moments demand to be seen, not just read.
From here, the workflow moves to prioritizing key moments: the narrative beats that define the arc, the transitions that anchor pace, and the shots that deliver emotional or informational payloads. These are the frames that will shape the storyboard’s skeleton. At this stage, collaboration with the director and cinematographer is essential. Their vision, preferences for coverage, and sense of rhythm inform what gets prioritized and how scenes are spatially imagined. This is where the script’s subtext is translated into camera language.
Script analysis for effective storyboarding
Script visualization is not a one-size-fits-all procedure. It requires reading between the lines—interpreting what’s implied, not just what’s explicit. Practitioners ask: What’s the emotional core of this scene? Where does the tension crest? What visual motif recurs? The answers guide choices about shot size, angle, and composition. Effective storyboarding means distilling the script’s intent into images that are both evocative and actionable for production. This analysis is where theory meets craft: understanding genre conventions, cultural context, and audience expectation all shape how the storyboard is constructed.
The storyboard workflow here is iterative. Initial sketches are rough, designed for speed and clarity, not polish. The aim is to externalize ideas quickly and invite feedback—especially from key collaborators. These early boards are a testing ground for pacing, visual continuity, and the interplay of movement and stillness. Revisions are expected; the process rewards adaptability over perfectionism.
Visualizing narrative beats in storyboarding for filmmakers
Turning scripts into storyboards is ultimately about visualization—making the intangible tangible. Filmmakers use a range of tools, from pencil and paper to digital platforms, to render scenes. The choice of tool matters less than the clarity of thought behind each panel. Each frame must communicate intent: Is this a close-up that isolates a character’s reaction, or a wide that contextualizes action within a space? The balance between detail and clarity is critical. Too much detail bogs down the process and obscures the scene’s purpose; too little invites misinterpretation on set.
Storyboarding is also a collaborative act. Directors and cinematographers bring their own visual grammar, and the best boards are those that leave space for interpretation while anchoring the production’s visual logic. The goal is not to dictate every shot, but to provide a shared visual reference that can flex with the realities of production. This is where the storyboard becomes more than a planning tool—it becomes a creative bridge between the written word and the moving image.
For those interested in deepening their approach, integrating a robust script breakdown before storyboarding and refining shot planning techniques will elevate both efficiency and creative outcomes. The storyboarding process, at its best, is where preparation meets imagination—and where the film’s visual identity first takes shape.
Why Storyboarding for Filmmakers is Essential
What is storyboarding for filmmakers?
Storyboarding for filmmakers is not a preliminary sketch; it is the blueprint for visual storytelling. Each panel translates narrative intent into concrete images, mapping out composition, movement, and rhythm before a single frame is shot. This process anchors the creative vision, giving form to what could otherwise remain abstract. In the filmmaking pre-production phase, the storyboard is the first tangible articulation of a film’s visual language—one that shapes decisions from lens choice to lighting setups.
How does storyboarding improve film production?
The benefits of storyboarding are not theoretical—they are operational. A well-constructed storyboard acts as a communication tool, aligning directors, cinematographers, and department heads around a shared vision. It eliminates ambiguity, reducing the margin for error on set. Storyboards serve as a visual contract: every department can anticipate requirements, from art direction to stunts, and plan accordingly. This clarity accelerates the filmmaking workflow, minimizing costly delays and misinterpretations that can derail a shoot.
Why every filmmaker should use storyboards
Storyboarding is not just for the cautious or the inexperienced; it is a discipline that underpins professional filmmaking. On a practical level, storyboards facilitate accurate budgeting and scheduling. When each scene’s demands are visualized, producers can allocate resources with precision—no guesswork, no unnecessary contingency. This foresight is invaluable, especially when stakes and budgets climb.
Creatively, storyboards are a crucible for decision-making. They invite scrutiny and iteration at the right moment—before sets are built and actors are called. Directors can experiment with shot order, pacing, and transitions on the page, not the clock. By confronting weaknesses early, storyboarding prevents costly fixes in post-production and supports a more intentional visual planning process.
For aspiring filmmakers, the discipline of storyboarding is a rite of passage. It trains the mind to think in images, to anticipate the interplay of space, movement, and emotion. For professionals, it is a safeguard against complacency and chaos. The most celebrated filmmakers—regardless of style—use storyboards not as a crutch, but as a foundation. They know that clarity in pre-production unlocks freedom on set.
In an industry that balances art with logistics, storyboarding for filmmakers is the tool that holds both together. It is where vision meets execution, and where the film truly begins to take shape.
Choosing the Right Aspect Ratio in Storyboarding for Filmmakers
How aspect ratio shapes your storyboard
Storyboarding for filmmakers is not just about sketching frames—it's about pre-visualizing the architecture of your film. The aspect ratio in film, the proportional relationship between width and height of the frame, is foundational. It determines the boundaries within which every visual decision is made. When you draw a storyboard, the frame size you choose must echo the intended screen format. If you’re planning for a 4:3 project, your boards should reflect that. For most contemporary projects, common choices include 4:3, 16:9, 1.85:1, 2:1, and 2.39:1 (StudioBinder, 2024). This isn’t a technicality—it’s the first creative constraint that shapes your storytelling canvas.
Picking the best aspect ratio for your film project
Each aspect ratio carries distinct visual and emotional weight. The 16:9 (1.78:1) frame is the default for digital platforms and broadcast, offering flexibility for dialogue-driven scenes and balanced compositions. The 1.85:1 and 2.39:1 ratios, by contrast, are cinematic standards. The latter—2.39:1—has become synonymous with spectacle, scale, and immersion, dominating over 70% of Hollywood films in the past two decades (Storyboom, 2024). But these aren’t mere trends. They’re strategic decisions that signal genre, intent, and even cultural context. A tight 4:3 can evoke intimacy or nostalgia, while a wide 2.39:1 can stretch the world, amplifying isolation or grandeur. Matching your storyboard frame size to your chosen aspect ratio is non-negotiable if you want to avoid costly misalignments in production and post.
Storyboarding for filmmakers: framing and visual impact
Aspect ratio is a tool, not just a specification. In practice, it governs everything from blocking and lens choice to the emotional resonance of a shot. Consider how a character’s placement in a 2.39:1 frame can communicate loneliness in a vast landscape, or how a 4:3 box can trap them in a claustrophobic domestic space. Storyboarding for filmmakers means anticipating these compositional dynamics from the outset. The storyboard becomes a site for testing how much negative space you want, how movement tracks across the frame, and how to lead the viewer’s eye. The visual impact of your film is seeded here, before a single shot is captured.
Genre and mood should also guide your aspect ratio decision. Horror and psychological drama often benefit from narrower frames that intensify focus and tension. Epics and adventure films leverage wide ratios to create scope. Even within a project, shifting aspect ratios can mark narrative transitions—a technique famously used by Sam Raimi in ‘Oz The Great and Powerful’ to signal a thematic shift. These choices are not arbitrary. They are calculated, narrative-driven moves that begin on the storyboard page.
Ultimately, storyboarding for filmmakers is an act of translation: converting creative intent into visual structure. The aspect ratio you select is your first, and perhaps most consequential, translation choice. It’s not about following fashion—it’s about aligning every frame with your film’s core vision. For a deeper dive into the mechanics, see our aspect ratio guide and explore advanced techniques in cinematic framing.
Depicting Movement: Characters and Camera in Storyboards
How to show movement in storyboards
Depicting movement in storyboards is a test of both visual economy and narrative intent. The storyboard is not a comic strip; it is a functional document for production, designed to clarify action in storyboards and the choreography between character movement and camera motion. The challenge is to translate kinetic energy—what happens and how it feels—into static frames that a production crew can interpret at a glance.
Arrows are the lingua franca of movement. For character movement, a single bold arrow might indicate a sprint across the frame, while a cluster of smaller arrows could denote a crowd dispersing. The direction, thickness, and even the style of the arrow (dashed for tentative, solid for assertive) can be tailored to the action’s tone. Annotations matter: “runs left,” “hesitates,” “drops bag.” This clarity prevents misreading, especially when storyboards are passed between departments. Visual shorthand, when consistent, becomes a shared language that bridges creative vision and logistical execution.
Representing camera motion in storyboarding for filmmakers
Camera motion must be distinguished sharply from character or object movement. The most reliable method is to use arrows at the frame’s edges to indicate camera moves: a lateral arrow for pan, a vertical one for tilt, or a set of arrows radiating from all four corners for a dolly out or pullback. This approach, paired with brief text—“CAMERA PANS RIGHT”—removes ambiguity and aligns the depiction with the director’s intent (StudioBinder, 2024). For more complex moves, such as a whip pan or a rack focus, storyboard artists often illustrate the beginning, middle, and end of the movement arc, sometimes overlaying a faint line to trace the camera’s path (StoryboardArt.org, 2024). This layered approach helps the team anticipate transitions and plan for dynamic storyboarding challenges.
Visual cues for dynamic scenes in storyboards
Energy and pacing are not just byproducts of editing; they begin at the storyboard stage. The placement and rhythm of panels—tight, sequential frames for rapid action; wide, spaced-out panels for languid moments—signal tempo. Strike-block patterns (alternating beats of action and pause) can be mapped visually, guiding editors and directors on the intended rhythm. Depth cues, such as objects moving toward or away from the camera, not only add dimensionality but also inform shot transitions and blocking. These cues are not decorative; they are functional, ensuring that the storyboard is a practical tool for both creative exploration and production logistics.
Common mistakes in showing movement
The most frequent error is conflating character movement with camera motion—using the same arrow style for both, or failing to annotate clearly. This creates confusion in pre-production and can lead to costly misinterpretations on set. Another pitfall is overcomplicating the panel with excessive arrows or unclear visual cues, which muddies the storyboard’s communicative value. Simplicity and consistency are the antidotes: use a disciplined set of symbols, pair them with concise notes, and always prioritize the director’s vision over visual flourish.
Ultimately, depicting movement in storyboards is about more than just arrows and frames. It’s about distilling intent—narrative, emotional, and logistical—into a visual sequence that can be executed with confidence. When done well, it becomes the invisible architecture behind every dynamic shot.
The Art of Continuity: Ensuring Seamless Storytelling
Continuity in storyboarding is not just a technical requirement—it’s the silent engine that powers narrative flow. When visual continuity collapses, so does the viewer’s immersion. In the storyboard phase, every frame is a contract: what is established must be honored. This discipline is as much about respect for the audience’s intelligence as it is about craft. For those who have spent time both on set and in the edit suite, the stakes are clear. Continuity errors are rarely forgiven by a discerning eye, and the cost is always paid in diminished impact.
How to maintain continuity in storyboarding for filmmakers
Maintaining flow begins with a rigorous approach to storyboard consistency. Every character position, prop placement, and environmental detail must be mapped with intent. The storyboard is not a loose sketch—it’s a blueprint. Practitioners develop their own shorthand for tracking these elements: annotated overlays, color-coded layers, or even simple written cues in the margins. The goal is to build a visual logic that can withstand the inevitable pressures of production—schedule changes, location shifts, and the limits of memory.
One proven strategy is to create a continuity checklist at the outset. This document, living alongside the storyboard, itemizes key visual elements for each scene. As the project evolves, this checklist becomes a touchstone, minimizing the risk of overlooked details. It’s not about bureaucratic process; it’s about protecting the integrity of the story’s internal world.
Common continuity mistakes in storyboards
Even skilled teams fall prey to recurring errors. The most frequent: inconsistent character orientation (left-to-right reversals), missing or magically reappearing props, and background elements that shift without narrative justification. These lapses are rarely intentional. They result from a lack of systematic review, or from siloed workflows where storyboard artists and directors fail to align on the details that matter. The fix is not more meetings, but a sharper discipline—reviewing each board with fresh eyes and a ruthless commitment to logical flow.
Tools for tracking visual consistency in storyboards
Technology can support, but never replace, the eye of the practitioner. Digital storyboard platforms now offer version control, annotation layers, and asset libraries that help teams maintain visual continuity. Yet, the most effective tool remains the human checklist, updated in real time. Some productions go further, assigning a dedicated continuity supervisor even at the storyboard stage—a role traditionally reserved for live-action shoots, but increasingly relevant as storyboards become more complex and collaborative.
Ultimately, continuity in storyboarding is about audience comprehension. When the visual thread is unbroken, viewers stay anchored in the world you’ve built. Break that thread, and even the most compelling narrative risks unraveling. For creative leaders, the mandate is clear: continuity is not a box to tick, but a core discipline that shapes the very possibility of seamless storytelling.
Breaking Down the 180-Degree Rule in Storyboarding
What is the 180-degree rule in storyboarding?
The 180-degree rule in storyboarding is a foundational filmmaking rule that governs spatial relationships on screen. It dictates that, for any scene involving two or more characters or elements interacting, the camera must remain on one side of an imaginary axis—the “line of action”—to maintain consistent left-right orientation. This rule isn’t arbitrary. It’s a visual storytelling rule designed to anchor the audience’s sense of space, making sure viewers always know where characters are in relation to each other and the environment. Break it, and you risk disorienting your audience, making even simple exchanges confusing.
Applying the 180-degree rule to your storyboards
In practice, storyboarding with the 180-degree rule means mapping out the line of action early and ensuring every shot adheres to it unless there’s a deliberate reason not to. Each panel should clearly indicate camera placement and character positioning relative to the line. This is not just about technical discipline; it’s about clarity of intent. By visualizing the rule in storyboard panels, you create a blueprint that guides camera placement and scene direction on set. The result is a sequence that feels coherent, no matter how complex the blocking or the edit becomes. When the rule is respected, the audience subconsciously trusts the spatial logic of the film—an invisible contract between filmmaker and viewer.
When to break the 180-degree rule in filmmaking
Breaking the 180-degree rule can be powerful, but only when done with purpose. Unintentional violations tend to jar the audience, pulling them out of the narrative and undermining the film’s spatial logic. The classic example is a shot-reverse-shot sequence where, after an axis jump, characters suddenly appear to swap sides—left becomes right, and the scene loses its visual anchor. The result is confusion, not engagement.
But when a filmmaker crosses the line intentionally, it becomes a narrative device. Consider moments of psychological disorientation, power shifts, or the collapse of order within a scene. Deliberately breaking the rule can heighten tension or signal a rupture in the story world. The key is to storyboard these moments with precision: show the axis, indicate the intended jump, and make the transition clear in the visual plan. This isn’t rule-breaking for its own sake—it’s a calculated move that leverages audience expectations for effect.
Rethinking rules: The 180-degree rule as a creative tool
Ultimately, the 180-degree rule in storyboarding is less about rigid adherence and more about understanding the grammar of visual storytelling. Mastery means knowing when the rule serves your story and when breaking it can deepen the narrative. Like all filmmaking rules, it’s a tool—one that, when wielded with intent, shapes the viewer’s experience at a structural level. The storyboard is your first opportunity to make these decisions visible, deliberate, and, above all, cinematic.
Digital Tools and Templates: Modern Storyboarding for Filmmakers
Storyboarding has always been the hinge between concept and execution. For decades, the process meant pencil, paper, and a wall of pinned-up frames—a tactile ritual, but one that’s slow to iterate and siloed to whoever’s in the room. Digital storyboarding tools have fundamentally re-engineered this workflow, offering filmmakers a new set of levers for efficiency, clarity, and creative control. Today, the choice isn’t just about medium; it’s about how you want your team to work, revise, and share ideas at speed.
Best digital tools for storyboarding for filmmakers
Modern storyboarding software comes with a suite of features that traditional methods simply can’t match. Drag-and-drop interfaces, real-time collaboration, and cloud-based asset management are now baseline expectations. The best digital platforms allow you to import reference images, adjust aspect ratios on the fly, and annotate frames with precision. Crucially, they integrate with other production tools—shot lists, animatics, even editing timelines—so the storyboard isn’t an island but a living document in the production ecosystem. For those seeking recommendations, our storyboard app recommendations cover the platforms that actually deliver on these promises.
How to use storyboard templates effectively
Templates are more than time-savers—they’re frameworks for consistency and clarity. Well-designed storyboard templates reduce the cognitive load of layout decisions, letting filmmakers focus on visual storytelling. They standardize shot information, camera moves, and dialogue cues, making it easier for teams to read and interpret intent. Templates also speed up onboarding for new collaborators, ensuring that everyone’s working from the same visual grammar. For those looking to streamline their workflow, our template downloads offer a starting point grounded in industry best practices. The key is to adapt templates to your project’s needs—never let the template dictate the story, but let it accelerate the process.
Comparing digital vs traditional storyboarding methods
The argument isn’t nostalgia versus progress. Traditional storyboarding carries an undeniable tactile pleasure, and for some directors, the act of sketching by hand is inseparable from the creative process. But in a production environment where schedules compress and teams are often distributed, digital storyboarding tools win on every metric that matters to business and creative leaders. Digital boards are searchable, instantly shareable, and infinitely revisable. Mistakes or pivots don’t mean starting from scratch. Version control is built in, and feedback loops are measured in minutes, not days. The shift isn’t just about technology—it’s about aligning story development with the realities of modern production.
Integrating digital assets with other production tools
Perhaps the most significant advantage of modern storyboarding is integration. Digital assets—frames, notes, references—flow directly into scheduling, budgeting, and post-production platforms. This eliminates double-handling and ensures that creative intent is preserved from pre-visualization through final edit. The right storyboarding software acts as connective tissue, not a standalone artifact. When evaluating platforms, prioritize those that play well with your existing stack and support open file formats for maximum flexibility.
Ultimately, the move to digital storyboarding isn’t just about keeping pace with industry trends. It’s about giving creative teams the tools to visualize, iterate, and communicate at the speed that today’s productions demand. The best digital storyboarding tools don’t just replace paper—they redefine what’s possible for filmmakers who refuse to treat storyboards as a static formality.
Industry Insights: Storyboarding Best Practices and Pitfalls
Top storyboarding mistakes filmmakers make
Even seasoned teams fall prey to common storyboarding mistakes. The most frequent: overloading panels with detail, muddying the visual intent. A storyboard is not a script—its strength lies in clarity, not encyclopedic coverage. Another pitfall is ambiguous composition: unclear framing or action direction leads to confusion downstream, especially when schedules compress and decisions get made in the edit or on set. Finally, some artists treat storyboards as static blueprints, failing to update them as production realities shift. This rigidity is costly; storyboards must be living documents, not museum pieces.
Storyboarding for filmmakers: expert workflow tips
Effective storyboard artists cultivate several essential habits. They start with the end in mind, always anchoring panels to the director’s visual language and the project’s production constraints. They maintain a disciplined feedback loop, seeking early input from key collaborators—DP, production designer, AD—rather than waiting for a “final” pass. This iterative approach prevents wasted effort and surfaces blind spots before they become expensive. Streamlining revisions is equally critical: use consistent file naming, version control, and clear annotation to avoid confusion as boards evolve. A storyboard review checklist can be invaluable for catching overlooked issues before they escalate.
Improving your storyboard clarity and impact
Clarity is non-negotiable. Every panel should communicate the shot’s intent at a glance—framing, movement, emotional tone. Avoid overcrowded visuals; if a panel requires excessive arrows, text, or supplementary notes, it’s likely too complex. Break it down. Use contrast and negative space to guide the viewer’s eye. When in doubt, prioritize readability over rendering finesse. This is where professional storyboarding tips matter: a storyboard isn’t a portfolio piece, it’s a production tool. Speed can’t come at the expense of accuracy, but neither can perfectionism stall progress. The best artists strike a balance, delivering boards that are both fast and functional.
Adaptability: the overlooked skill in storyboarding best practices
Production is fluid. Locations change, weather intervenes, performances surprise. The most valuable storyboard artists are those who stay adaptable—ready to revise boards quickly in response to new information. This doesn’t mean working sloppily; it means building flexibility into your process and mindset. Keep working files organized for rapid updates, and don’t become precious about any single solution. Remember, the goal is to empower the production, not to create untouchable art. The storyboard’s job is to serve the film’s evolving needs, not to resist them.
Ultimately, storyboarding best practices are about more than drawing skill—they’re about communication, process, and adaptability. Avoid the traps of overcrowding, ambiguity, and rigidity. Build in feedback, keep your workflow lean, and always be ready to pivot as production demands. That’s how storyboards become indispensable, not just decorative.
Real-World Examples: Storyboarding for Filmmakers in Action
Storyboarding for filmmakers: real film examples
Storyboarding for filmmakers is never an academic exercise. It’s a pragmatic tool that shapes the flow, rhythm, and coherence of a film—long before a camera rolls. Take Hitchcock’s “Psycho” shower scene. The sequence’s tension and clarity aren’t accidents. They’re the result of meticulous storyboarding, where each frame was mapped for maximum psychological impact. Hitchcock’s boards dictated not just camera angles but also the tempo of the edit, ensuring the violence was implied rather than explicit. The result: a sequence as iconic for its restraint as its shock value. This is storyboarding as pre-visualization, but also as pre-dramatization—every beat anticipated, every cut purposeful.
What great storyboards teach us
Successful storyboards are not just about pretty frames. They are blueprints for decision-making. In “Mad Max: Fury Road,” George Miller’s boards were so detailed they served as the film’s de facto script. The production’s relentless momentum, its visual coherence amid chaos, came from boards that mapped character arcs and action geography in equal measure. The lesson: storyboards are not static—they’re dynamic documents that can unify departments, align vision, and even dictate the pace of production. When boards are this robust, they become a shared language across creative and technical teams.
Case studies of storyboarding success
Consider Bong Joon-ho’s “Parasite.” The semi-basement flooding sequence is a masterclass in spatial storytelling. Bong’s storyboards didn’t just choreograph movement; they dictated lighting, water levels, and actor positioning. This granular planning allowed for a seamless blend of practical and visual effects, with every element serving the narrative’s emotional undertow. Another example: the “Raiders of the Lost Ark” truck chase. Spielberg and his team storyboarded each stunt, camera move, and beat, allowing them to shoot out of sequence while maintaining narrative clarity. Here, the storyboard was a safety net and a creative springboard—enabling improvisation within a tightly controlled structure.
Applying storyboard case studies to your own projects
What sets these industry examples apart is not just the quality of the draftsmanship, but the clarity of intent. Great storyboards answer the “why” as much as the “what.” They clarify motivation, reveal subtext, and anticipate challenges. For filmmakers, the takeaway is clear: treat the storyboard as a living document. Use it to interrogate your choices, communicate your vision, and pre-empt production pitfalls. Whether you’re working on a commercial, a branded short, or a feature, the discipline of storyboarding—done well—saves time, money, and creative energy. It’s not about drawing ability; it’s about thinking structurally and visually, learning from film masters, and ensuring every frame has a reason to exist.
For those seeking deeper dives, a storyboard case analysis of these sequences reveals not just technical mastery but a philosophy of filmmaking: storyboarding for filmmakers is less about control and more about clarity. The best boards are those that let the production breathe—while never losing sight of the story’s spine.
Conclusion
Storyboarding is not a technical chore—it's the backbone of filmmaking pre-production. Across genres and budgets, the storyboard is where intention meets execution. It’s the first translation of script to image, a practical tool that shapes the entire filmmaking workflow. For filmmakers who understand its value, storyboarding is less about drawing pretty pictures and more about clarifying vision, mapping logistics, and preempting challenges that can derail a shoot. It’s a process that demands both creative foresight and operational discipline.
At its core, storyboarding is about visual storytelling. It’s the space where narrative beats become visual rhythms, where movement and continuity are architected before a single frame is captured. This is not just about preventing mistakes; it’s about enabling momentum. Every shot, angle, and transition is interrogated for its purpose and impact, ensuring that the director’s intent survives the journey from page to screen. The storyboard becomes a shared language for teams—directors, cinematographers, designers, and editors—aligning creative choices with the practical realities of production.
Effective storyboarding best practices don’t just save time; they create it. By resolving creative and logistical questions early, productions gain flexibility when it matters most. Continuity is preserved not as an afterthought, but as a living thread woven through every sequence. This is especially critical in complex shoots, where visual coherence must be maintained across multiple units, locations, or days. When storyboards are robust, the production can adapt without losing direction, and post-production teams can anticipate challenges before they become costly problems.
The real impact of storyboarding is felt in the flow of the entire filmmaking process. It’s the quiet force that underpins script visualization, dynamic storyboarding, and the seamless handoff between departments. In a landscape where efficiency and creativity are often positioned as opposites, storyboarding proves they are inseparable. For filmmakers serious about their craft, it remains the most reliable foundation for turning vision into reality—shot by shot, sequence by sequence.
FAQs
What is the importance of storyboarding in filmmaking?
Storyboarding is the visual architecture of a film. It translates abstract ideas into concrete images, aligning creative vision with production realities. By mapping out each shot, storyboarding clarifies intent, streamlines communication among departments, and preempts costly missteps. It’s not just an artistic exercise—it’s a foundational tool for efficiency and cohesion in filmmaking.
How do you convert a script into a storyboard?
Converting a script into a storyboard starts with breaking the script down scene by scene, identifying key beats and visual moments. Each shot is then sketched out, focusing on composition, camera angle, and action. Annotations clarify movement or dialogue. The process is iterative—refining visuals until the sequence feels both narratively and visually coherent.
What aspect ratio should I choose for my storyboard?
The aspect ratio you choose should mirror your intended final output. A widescreen ratio (like 2.39:1) suggests cinematic scale, while 16:9 suits digital platforms. This decision shapes framing, composition, and even narrative emphasis. Aligning your storyboard’s aspect ratio with your production’s ensures visual planning translates directly to the screen.
How can I depict movement in my storyboards?
Movement is depicted through directional arrows, motion lines, and sequential frames. For character movement, arrows indicate trajectory or gesture. For camera movement—like pans, tilts, or dollies—use labeled arrows or notes. The goal is clarity; anyone reading the storyboard should instantly understand how motion shapes the shot’s rhythm and focus.
What is continuity in storyboarding and why is it important?
Continuity ensures that visual and narrative logic flows seamlessly from shot to shot. In storyboarding, this means tracking character positions, props, lighting, and movement. It prevents jarring visual errors in the final edit, allowing the audience to remain immersed in the story without distraction or confusion. It’s the invisible glue of coherent storytelling.
What is the 180-degree rule in storyboarding?
The 180-degree rule maintains consistent spatial relationships on screen by keeping the camera on one side of an imaginary axis between characters. In storyboarding, this is mapped out to avoid disorienting the viewer. Breaking the rule can be deliberate, but it must be intentional and clear—otherwise, it risks narrative confusion.
What are some best practices for storyboarding?
Prioritize clarity over artistry—storyboards are blueprints, not finished art. Use consistent aspect ratios, concise annotations, and logical sequencing. Involve department heads early to flag production challenges. Revisit and revise as the project evolves. Effective storyboarding anticipates problems, aligns creative and logistical priorities, and keeps the production moving forward with intent.


LEAVE A COMMENT
Your email address will not be published.